mNo edit summary Tag: Visual edit |
m (correcting mistakes in my recently added text) Tag: Visual edit |
||
| (41 intermediate revisions by 8 users not shown) | |||
| Line 1: | Line 1: | ||
| + | A player's '''population''' lies at the heart of all Anno titles, and provides the player with the [[workforce]] and [[Credits|tax income]] necessary to sustain their cities and creations. At the start of a game, the player's population is little more than a gathering of humble farmers living in huts, but like in all Anno titles that came before it, is able to guide them across a social ladder by supplying them with their '''needs'''. This allows the population to evolve into new, more advanced social classes, which will be reflected by the quality of their [[Residences|dwellings]]. These different social classes are referred to as '''population''' '''tiers'''. By reaching milestones in population sizes and tiers, more features and [[buildings]] are unlocked. |
||
| − | [[File:.BubbleWorkforce.JPG|thumb|73x73px|A population bubble.]] |
||
| − | A player's '''population''' is the heart of cities in all Anno titles, providing a city's workforce and tax income. As city populations grow from small beginnings, more social classes (residential tiers) evolve. |
||
| − | The number of inhabitants |
+ | The global number of inhabitants living inside a player's empire, is shown at the top of the screen, next to the population symbol [[File:Population.png|20x20px]]. Hovering over this symbol with the mouse, breaks this information down into seperate tiers. |
| + | When hovering over an island, its population status appears at the top of the screen (see picture below). |
||
| − | An interface bubble fills up as more individuals of each population tier settle. |
||
| + | [[File:Pop_Bar.png|frame|center|When hovering over an island, the center-top bar will show a portrait of the highest population class. The lower strip breaks down the number of people belongs to each population class, represented by their associated icon.]] |
||
| − | [[File:.ControlPanel.JPG|thumb|271x271px|Control Panel showing treasury, income and population.]] |
||
| + | |||
| + | __TOC__ |
||
== Population Tiers == |
== Population Tiers == |
||
| + | In [[Anno 1800]], there are six population tiers in the [[Old World]], two in the [[New World]], two in [[The Arctic]] and two in [[Enbesa]]. Each resides in a 3x3 [[Residences|house]] (except Scholar Residences which size is 4x4) and has different [[needs]]. |
||
| − | ''Please note: at the moment, only Farmers, Workers, Artisans, Jornaleros, and Obreros are available in the Closed Beta. Any information about Engineers or Investors beyond what has been published in the dev blogs is unconfirmed at this time.'' |
||
| + | === {{Infoicon OldWorld}} === |
||
| − | In [[Anno 1800]], there are five population (residential) tiers in the Old World and two in the New World. Each live in 3x3 houses and have different needs. |
||
| − | |||
| − | === Old World === |
||
{| class="article-table" |
{| class="article-table" |
||
| + | ! |
||
| − | !Farmers |
||
| + | ==== Farmers ==== |
||
! |
! |
||
|- |
|- |
||
| Line 21: | Line 21: | ||
!Farmers are the first residential tier. When you build new houses, farmers move in. They have the most basic needs of all the tiers. |
!Farmers are the first residential tier. When you build new houses, farmers move in. They have the most basic needs of all the tiers. |
||
|- |
|- |
||
| + | ! |
||
| − | !Workers |
||
| + | ==== Workers ==== |
||
! |
! |
||
|- |
|- |
||
| Line 27: | Line 28: | ||
!Workers represent the bulk of the population in the 19th century. They provide significant manual labour, working in factories. |
!Workers represent the bulk of the population in the 19th century. They provide significant manual labour, working in factories. |
||
|- |
|- |
||
| + | ! |
||
| − | !Artisans |
||
| + | ==== Artisans ==== |
||
! |
! |
||
|- |
|- |
||
| Line 33: | Line 35: | ||
!Belonging to the third residential tier, Artisans are the educated middle class who not only focus on providing industry and commerce, but specialised craft. |
!Belonging to the third residential tier, Artisans are the educated middle class who not only focus on providing industry and commerce, but specialised craft. |
||
|- |
|- |
||
| + | ! |
||
| − | !Engineers |
||
| + | ==== Engineers ==== |
||
! |
! |
||
|- |
|- |
||
| Line 39: | Line 42: | ||
!Engineers are the educated elite, seeking to push the world into a modern age through technological revolution. |
!Engineers are the educated elite, seeking to push the world into a modern age through technological revolution. |
||
|- |
|- |
||
| + | ! |
||
| − | !Investors |
||
| + | ==== Investors ==== |
||
! |
! |
||
|- |
|- |
||
![[File:Anno1800 investors.jpg|thumb|225px]] |
![[File:Anno1800 investors.jpg|thumb|225px]] |
||
!The fifth and final tier, Investors are the wealthy elite, members of an upper class who have built fortunes off inheritances or their wit and bare hands. |
!The fifth and final tier, Investors are the wealthy elite, members of an upper class who have built fortunes off inheritances or their wit and bare hands. |
||
| + | |- |
||
| + | ! |
||
| + | ==== Scholars ==== |
||
| + | ! |
||
| + | |- |
||
| + | ![[File:Scholar_Talking_Head.png|thumb|225px]] |
||
| + | !Scholars represent a typical international student, hailing from distant Enbesa and other parts of the world. Instead of being an upgrade from another tier, their residences require a construction permit which needs to be researched at the Research Institute. They do not provide income, but instead generate a constant stream of Research Points. |
||
|} |
|} |
||
| − | === |
+ | === {{Infoicon NewWorld}} === |
{| class="article-table" |
{| class="article-table" |
||
| + | ! |
||
| − | !'''Jornaleros''' |
||
| + | ==== Jornaleros ==== |
||
! |
! |
||
|- |
|- |
||
| Line 54: | Line 66: | ||
!The first tier, Jornaleros are the farmers of the New World, devout and hardworking people who are driven by the dream of independence at a dawn of a new era. |
!The first tier, Jornaleros are the farmers of the New World, devout and hardworking people who are driven by the dream of independence at a dawn of a new era. |
||
|- |
|- |
||
| + | ! |
||
| − | !Obreros |
||
| + | ==== Obreros ==== |
||
! |
! |
||
|- |
|- |
||
| Line 61: | Line 74: | ||
|} |
|} |
||
| − | == |
+ | === {{Infoicon Arctic}} === |
| + | {| class="article-table" |
||
| − | Population needs are divided into two categories: basic needs and luxury needs. |
||
| + | ! |
||
| − | |||
| + | ==== Explorers ==== |
||
| − | Fulfilling '''basic needs''' increases the number of inhabitants in each house. Houses have to be full in order to advance them to higher population tiers. |
||
| + | ! |
||
| − | |||
| − | Fulfilling '''luxury needs''' makes population happier and pay higher taxes in return. |
||
| − | |||
| − | {| |
||
| − | |colspan=2 style="text-align:center;"|'''What do the columns mean?''' |
||
|- |
|- |
||
| + | ![[File:Explorer_Talking_Head.png|thumb|220x220px]] |
||
| − | !Need |
||
| + | !The first tier of The Arctic population, Explorers have come to the Arctic to challenge themselves, honor the stories of their fathers and appreciate the innate beauty of the North Pole. |
||
| − | |The need of this row. |
||
|- |
|- |
||
| + | ! |
||
| − | !Consumption |
||
| − | |The amount of goods each inhabitant of this tier consumes every minute. |
||
| − | |- |
||
| − | !Influx |
||
| − | |The amount of people moving into each house of this tier due to fulfilling this need. |
||
| − | |- |
||
| − | ![[#Happiness|Happiness]] |
||
| − | |The increase in happiness due to fulfilling this need. |
||
| − | |- |
||
| − | !Income |
||
| − | |The increase in income due to fulfilling this need. |
||
| − | |- |
||
| − | !Population requirement |
||
| − | |The required amount of inhabitants of this tier to have access to this need. |
||
| + | ==== Technicians ==== |
||
| − | |} |
||
| + | ! |
||
| − | |||
| − | === Old World === |
||
| − | |||
| − | ==== Farmers needs ==== |
||
| − | {| class="mw-collapsible mw-collapsed article-table" style="text-align: left;" |
||
|- |
|- |
||
| − | ![[File: |
+ | ![[File:Technician_Talking_Head.png|thumb|220x220px]] |
| + | !The second tier of The Arctic population, Technicians have come to the Arctic in search of the scientific breakthrough that will finally give them the recognition they crave. |
||
| − | ! colspan="6" |Farmers' Needs |
||
| − | |- |
||
| − | ! style="text-align:center;" | |
||
| − | !Need |
||
| − | !Consumption |
||
| − | !Influx |
||
| − | !Happiness |
||
| − | !Income |
||
| − | !Population requirement |
||
| − | |- |
||
| − | | rowspan="3" |'''Basic Needs:''' |
||
| − | |[[File:Marketplace.png|24px]][[Marketplace|Market]] |
||
| − | | style="text-align:center;" | |
||
| − | | style="text-align:center;" |5 |
||
| − | | style="text-align:center;" | - |
||
| − | | style="text-align:center;" | |
||
| − | | style="text-align:center;" | |
||
| − | |- |
||
| − | |[[File:Fish-0.png|24px]][[Fishery|Fish]] |
||
| − | | style="text-align:center;" |0,0025000002 |
||
| − | | style="text-align:center;" |3 |
||
| − | | style="text-align:center;" | - |
||
| − | | style="text-align:center;" | +1/+1/? |
||
| − | | style="text-align:center;" |50 |
||
| − | |- |
||
| − | |[[File:Work_clothes.png|24px]][[Framework Knitters|Work Clothes]] |
||
| − | | style="text-align:center;" |0,003076926 |
||
| − | | style="text-align:center;" |2 |
||
| − | | style="text-align:center;" | - |
||
| − | | style="text-align:center;" | +4/+3/? |
||
| − | | style="text-align:center;" |150 |
||
| − | |- |
||
| − | | rowspan="2" |'''Luxury Needs:''' |
||
| − | |[[File:Schnapps-0.png|24px]][[Schnapps Distillery|Schnapps]] |
||
| − | | style="text-align:center;" |0,003333336 |
||
| − | | style="text-align:center;" | - |
||
| − | | style="text-align:center;" |8 |
||
| − | | style="text-align:center;" | +4/+3/? |
||
| − | | style="text-align:center;" |100 |
||
| − | |- |
||
| − | |[[File:Pub.png|24px]][[Pub]] |
||
| − | | style="text-align:center;" | |
||
| − | | style="text-align:center;" | - |
||
| − | | style="text-align:center;" |12 |
||
| − | | style="text-align:center;" | +2/+1/? |
||
| − | | style="text-align:center;" |150 |
||
| − | |} |
||
| − | ==== Workers needs ==== |
||
| − | {| class="mw-collapsible mw-collapsed article-table" style="text-align: left;" |
||
| − | |- |
||
| − | ![[File:Workforce_-_workers.png|32px]][[File:Workers.png|48px]] |
||
| − | ! colspan="6" |Workers' Needs |
||
| − | |- |
||
| − | ! style="text-align:center;" | |
||
| − | !Need |
||
| − | !Consumption |
||
| − | !Influx |
||
| − | !Happiness |
||
| − | !Income |
||
| − | !Population requirement |
||
| − | |- |
||
| − | | rowspan="7" |'''Basic Needs:''' |
||
| − | |[[File:Marketplace.png|24px]][[Marketplace|Market]] |
||
| − | | style="text-align:center;" | |
||
| − | | style="text-align:center;" |5 |
||
| − | | style="text-align:center;" | - |
||
| − | | style="text-align:center;" | |
||
| − | | style="text-align:center;" | |
||
| − | |- |
||
| − | | [[File:Fish-0.png|24px]][[Fishery|Fish]] |
||
| − | | style="text-align:center;" |0,0025000002 |
||
| − | | style="text-align:center;" |3 |
||
| − | | style="text-align:center;" | - |
||
| − | | style="text-align:center;" | +3/+2/? |
||
| − | | style="text-align:center;" | |
||
| − | |- |
||
| − | |[[File:Work_clothes.png|24px]][[Framework Knitters|Work Clothes]] |
||
| − | | style="text-align:center;" |0,003076926 |
||
| − | | style="text-align:center;" |2 |
||
| − | | style="text-align:center;" | - |
||
| − | | style="text-align:center;" | +7/+7/? |
||
| − | | style="text-align:center;" | |
||
| − | |- |
||
| − | |[[File:Sausages-0.png|24px]][[Slaughterhouse|Sausages]] |
||
| − | | style="text-align:center;" |0,001000002 |
||
| − | | style="text-align:center;" |3 |
||
| − | | style="text-align:center;" | - |
||
| − | | style="text-align:center;" | +5/+4/? |
||
| − | | style="text-align:center;" |1 |
||
| − | |- |
||
| − | |[[File:Bread-0.png|24px]][[Bakery|Bread]] |
||
| − | | style="text-align:center;" |0,00090909 |
||
| − | | style="text-align:center;" |3 |
||
| − | | style="text-align:center;" | - |
||
| − | | style="text-align:center;" | +5/+4/? |
||
| − | | style="text-align:center;" |150 |
||
| − | |- |
||
| − | |[[File:Soap-0.png|24px]][[Soap Factory|Soap]] |
||
| − | | style="text-align:center;" |0,000416667 |
||
| − | | style="text-align:center;" |2 |
||
| − | | style="text-align:center;" | - |
||
| − | | style="text-align:center;" | +5/+4/? |
||
| − | | style="text-align:center;" |300 |
||
| − | |- |
||
| − | |[[File:School_icon.png|24px]][[School]] |
||
| − | | style="text-align:center;" | |
||
| − | | style="text-align:center;" |2 |
||
| − | | style="text-align:center;" | - |
||
| − | | style="text-align:center;" | |
||
| − | | style="text-align:center;" |750 |
||
| − | |- |
||
| − | | rowspan="4" |'''Luxury Needs:''' |
||
| − | |[[File:Schnapps-0.png|24px]][[Schnapps Distillery|Schnapps]] |
||
| − | | style="text-align:center;" |0,003333336 |
||
| − | | style="text-align:center;" | - |
||
| − | | style="text-align:center;" |4 |
||
| − | | style="text-align:center;" | +7/+7/? |
||
| − | | style="text-align:center;" | |
||
| − | |- |
||
| − | |[[File:Pub.png|24px]][[Pub]] |
||
| − | | style="text-align:center;" | |
||
| − | | style="text-align:center;" | - |
||
| − | | style="text-align:center;" |6 |
||
| − | | style="text-align:center;" | +3/+3/? |
||
| − | | style="text-align:center;" | |
||
| − | |- |
||
| − | |[[File:Church.png|24px]][[Church]] |
||
| − | | style="text-align:center;" | |
||
| − | | style="text-align:center;" | - |
||
| − | | style="text-align:center;" |7 |
||
| − | | style="text-align:center;" | |
||
| − | | style="text-align:center;" |150 |
||
| − | |- |
||
| − | |[[File:Beer-0.png|24px]][[Brewery|Beer]] |
||
| − | | style="text-align:center;" |0,00076923 |
||
| − | | style="text-align:center;" | - |
||
| − | | style="text-align:center;" |3 |
||
| − | | style="text-align:center;" | +13/+11/? |
||
| − | | style="text-align:center;" |500 |
||
|} |
|} |
||
| − | + | === {{Infoicon Enbesa}} === |
|
| − | {| class=" |
+ | {| class="article-table" |
| + | ! |
||
| + | ==== Shepherds ==== |
||
| + | ! |
||
|- |
|- |
||
| − | ![[File: |
+ | ![[File:Shepherd_Talking_Head.png|thumb|220x220px]] |
| + | !Shepherds are the first of two residential tiers in the Enbesa. They love nature and stories by the campfire, while city life and politics seems to tire them. Their skills lie in agriculture and animal husbandry. |
||
| − | ! colspan="6" |Artisans' Needs |
||
|- |
|- |
||
| + | ! |
||
| − | ! style="text-align:center;" | |
||
| + | |||
| − | !Need |
||
| + | ==== Elders ==== |
||
| − | !Consumption |
||
| + | ! |
||
| − | !Influx |
||
| − | !Happiness |
||
| − | !Income |
||
| − | !Population requirement |
||
|- |
|- |
||
| + | ![[File:Elder_Talking_Head.png|thumb|220x220px]] |
||
| − | | rowspan="8" |'''Basic Needs:''' |
||
| + | !Being the second Enbesan residential tier, Elders’ experiences in life have given them an altogether dourer outlook on things. While they can be harsh and judgmental, their poignance belies a caring nature towards those who manage to earn their respect. |
||
| − | |[[File:Sausages-0.png|24px]][[Slaughterhouse|Sausages]] |
||
| − | | style="text-align:center;" |0,001333334 |
||
| − | | style="text-align:center;" |6 |
||
| − | | style="text-align:center;" | - |
||
| − | | style="text-align:center;" | +15/+13/+? |
||
| − | | style="text-align:center;" | |
||
| − | |- |
||
| − | |[[File:Bread-0.png|24px]][[Bakery|Bread]] |
||
| − | | style="text-align:center;" |0,001212122 |
||
| − | | style="text-align:center;" |6 |
||
| − | | style="text-align:center;" | - |
||
| − | | style="text-align:center;" | +15/+13/+? |
||
| − | | style="text-align:center;" | |
||
| − | |- |
||
| − | |[[File:Soap-0.png|24px]][[Soap Factory|Soap]] |
||
| − | | style="text-align:center;" |0,000555556 |
||
| − | | style="text-align:center;" |6 |
||
| − | | style="text-align:center;" | - |
||
| − | | style="text-align:center;" | +15/+13/+? |
||
| − | | style="text-align:center;" | |
||
| − | |- |
||
| − | |[[File:School_icon.png|24px]][[School]] |
||
| − | | style="text-align:center;" | |
||
| − | | style="text-align:center;" |4 |
||
| − | | style="text-align:center;" | - |
||
| − | | style="text-align:center;" | |
||
| − | | style="text-align:center;" | |
||
| − | |- |
||
| − | |[[File:Canned_food.png|24px]][[Cannery|Canned Food]] |
||
| − | | style="text-align:center;" |0,00034188 |
||
| − | | style="text-align:center;" |4 |
||
| − | | style="text-align:center;" | - |
||
| − | | style="text-align:center;" | +7/+7/+? |
||
| − | | style="text-align:center;" |1 |
||
| − | |- |
||
| − | |[[File:Sewing_machines.png|24px]][[Sewing Machine Factory|Sewing Machines]] |
||
| − | | style="text-align:center;" |0,00095238 |
||
| − | | style="text-align:center;" |2 |
||
| − | | style="text-align:center;" | - |
||
| − | | style="text-align:center;" | +15/+13/+? |
||
| − | | style="text-align:center;" |250 |
||
| − | |- |
||
| − | |[[File:Fur_Coats.png|24px]][[Fur Dealer|Fur Coats]] |
||
| − | | style="text-align:center;" |0,000888888 |
||
| − | | style="text-align:center;" |2 |
||
| − | | style="text-align:center;" | - |
||
| − | | style="text-align:center;" | +22/+?/+? |
||
| − | | style="text-align:center;" |900 |
||
| − | |- |
||
| − | |[[File:University.png|24px]][[University]] |
||
| − | | style="text-align:center;" | |
||
| − | | style="text-align:center;" |2 |
||
| − | | style="text-align:center;" | - |
||
| − | | style="text-align:center;" | |
||
| − | | style="text-align:center;" |1500 |
||
| − | |- |
||
| − | | rowspan="4" |'''Luxury Needs:''' |
||
| − | |[[File:Church.png|24px]][[Church]] |
||
| − | | style="text-align:center;" | |
||
| − | | style="text-align:center;" | - |
||
| − | | style="text-align:center;" |7 |
||
| − | | style="text-align:center;" | |
||
| − | | style="text-align:center;" | |
||
| − | |- |
||
| − | |[[File:Beer-0.png|24px]][[Brewery|Beer]] |
||
| − | | style="text-align:center;" |0,001025642 |
||
| − | | style="text-align:center;" | - |
||
| − | | style="text-align:center;" |3 |
||
| − | | style="text-align:center;" | +38/+34/+? |
||
| − | | style="text-align:center;" | |
||
| − | |- |
||
| − | |[[File:Variety_theatre.png|24px]][[Variety Theatre]] |
||
| − | | style="text-align:center;" | |
||
| − | | style="text-align:center;" | - |
||
| − | | style="text-align:center;" |6 |
||
| − | | style="text-align:center;" | +7/+7/+? |
||
| − | | style="text-align:center;" |250 |
||
| − | |- |
||
| − | |[[File:Rum.png|24px]][[Rum Distillery|Rum]] |
||
| − | | style="text-align:center;" |0,001904762 |
||
| − | | style="text-align:center;" | - |
||
| − | | style="text-align:center;" |4 |
||
| − | | style="text-align:center;" | +22/+?/+? |
||
| − | | style="text-align:center;" |500 |
||
|} |
|} |
||
| − | + | == Needs == |
|
| + | Your population has certain needs and satisfying them is one of the main objectives in Anno. Population needs in Old World and New World are divided into two categories: basic needs and luxury needs. Population needs in The Arctic work differently and are instead, divided into basic needs and heat. |
||
| − | {| class="mw-collapsible mw-collapsed article-table" style="text-align: left;" |
||
| + | |||
| − | |- |
||
| + | Fulfilling '''basic needs''' increases the number of inhabitants in each house. Houses have to be full in order to advance them to higher population tiers so satisfying all basic needs is necessary. |
||
| − | ![[File:Workforce_-_engineers.png|32px]][[File:Engineers.png|48px]] |
||
| + | |||
| − | ! colspan="6" |Engineers' Needs |
||
| + | Fulfilling '''luxury needs''' makes your population happy and pay higher taxes in return. Satisfying luxury needs is optional as people don't need to be happy to advance. |
||
| − | |- |
||
| + | |||
| − | ! style="text-align:center;" | |
||
| + | Fulfilling '''heat '''- the need to stay warm - will also make the Arctic population pay higher taxes, but instead of raising happiness, this will help prevent outbreaks of the [[City incidents#Arctic Flu|Arctic Flu]]. |
||
| − | !Need |
||
| + | |||
| − | !Consumption |
||
| + | Failure to fulfill a requested '''basic need '''or '''luxury need''' will result in the Newspaper Editor publishing an article that increased the consumption rate of goods by 10% in Old World and New World. This can be countered using propaganda. |
||
| − | !Influx |
||
| + | |||
| − | !Happiness |
||
| + | ''See: [[needs]] for more information.'' |
||
| − | !Income |
||
| − | !Population requirement |
||
| − | |- |
||
| − | | rowspan="8" |'''Basic Needs:''' |
||
| − | |[[File:Canned_food.png|24px]][[Cannery|Canned Food]] |
||
| − | | style="text-align:center;" |0,00051282 |
||
| − | | style="text-align:center;" |12 |
||
| − | | style="text-align:center;" | - |
||
| − | | style="text-align:center;" | +?/+?/+? |
||
| − | | style="text-align:center;" | |
||
| − | |- |
||
| − | |[[File:Sewing_machines.png|24px]][[Sewing Machine Factory|Sewing Machines]] |
||
| − | | style="text-align:center;" |0,0014285715 |
||
| − | | style="text-align:center;" |6 |
||
| − | | style="text-align:center;" | - |
||
| − | | style="text-align:center;" | +?/+?/+? |
||
| − | | style="text-align:center;" | |
||
| − | |- |
||
| − | |[[File:Fur_Coats.png|24px]][[Fur Dealer|Fur Coats]] |
||
| − | | style="text-align:center;" |0,0013333335 |
||
| − | | style="text-align:center;" |6 |
||
| − | | style="text-align:center;" | - |
||
| − | | style="text-align:center;" | +?/+?/+? |
||
| − | | style="text-align:center;" | |
||
| − | |- |
||
| − | |[[File:University.png|24px]][[University]] |
||
| − | | style="text-align:center;" | |
||
| − | | style="text-align:center;" |6 |
||
| − | | style="text-align:center;" | - |
||
| − | | style="text-align:center;" | |
||
| − | | style="text-align:center;" | |
||
| − | |- |
||
| − | |[[File:Glasses_0.png|24px]][[Spectacle Factory|Glasses]] |
||
| − | | style="text-align:center;" |0,000222222 |
||
| − | | style="text-align:center;" |4 |
||
| − | | style="text-align:center;" | - |
||
| − | | style="text-align:center;" | +?/+?/+? |
||
| − | | style="text-align:center;" |1 |
||
| − | |- |
||
| − | |[[File:Electric_works_oil_0.png|24px]][[Electricity]] |
||
| − | | style="text-align:center;" | |
||
| − | | style="text-align:center;" |2 |
||
| − | | style="text-align:center;" | - |
||
| − | | style="text-align:center;" | |
||
| − | | style="text-align:center;" |500 |
||
| − | |- |
||
| − | |[[File:Coffee.png|24px]][[Coffee Roaster|Coffee]] |
||
| − | | style="text-align:center;" |0,001176471 |
||
| − | | style="text-align:center;" |2 |
||
| − | | style="text-align:center;" | - |
||
| − | | style="text-align:center;" | +?/+?/+? |
||
| − | | style="text-align:center;" |1000 |
||
| − | |- |
||
| − | |[[File:Light_bulb_0.png|24px]][[Light Bulb Factory|Light Bulbs]] |
||
| − | | style="text-align:center;" |0,0003124995 |
||
| − | | style="text-align:center;" |2 |
||
| − | | style="text-align:center;" | - |
||
| − | | style="text-align:center;" | +?/+?/+? |
||
| − | | style="text-align:center;" |1750 |
||
| − | |- |
||
| − | | rowspan="5" |'''Luxury Needs:''' |
||
| − | |[[File:Variety_theatre.png|24px]][[Variety Theatre]] |
||
| − | | style="text-align:center;" | |
||
| − | | style="text-align:center;" | - |
||
| − | | style="text-align:center;" |6 |
||
| − | | style="text-align:center;" | +?/+?/+? |
||
| − | | style="text-align:center;" | |
||
| − | |- |
||
| − | |[[File:Rum.png|24px]][[Rum Distillery|Rum]] |
||
| − | | style="text-align:center;" |0,002857143 |
||
| − | | style="text-align:center;" | - |
||
| − | | style="text-align:center;" |4 |
||
| − | | style="text-align:center;" | +?/+?/+? |
||
| − | | style="text-align:center;" | |
||
| − | |- |
||
| − | |[[File:High_wheeler_0.png|24px]][[Bicycle Factory|High Wheelers]] |
||
| − | | style="text-align:center;" |0,0006250005 |
||
| − | | style="text-align:center;" | - |
||
| − | | style="text-align:center;" |5 |
||
| − | | style="text-align:center;" | +?/+?/+? |
||
| − | | style="text-align:center;" |500 |
||
| − | |- |
||
| − | |[[File:Pocket_watch_0.png|24px]][[Clockmakers|Pocket Watches]] |
||
| − | | style="text-align:center;" |0,0001960785 |
||
| − | | style="text-align:center;" | - |
||
| − | | style="text-align:center;" |3 |
||
| − | | style="text-align:center;" | +?/+?/+? |
||
| − | | style="text-align:center;" |1000 |
||
| − | |- |
||
| − | |[[File:Bank_0.png|24px]][[Bank]] |
||
| − | | style="text-align:center;" | |
||
| − | | style="text-align:center;" | - |
||
| − | | style="text-align:center;" |2 |
||
| − | | style="text-align:center;" | +?/+?/+? |
||
| − | | style="text-align:center;" |3000 |
||
| − | |} |
||
| − | + | == Happiness == |
|
| + | The happiness of your population is an important indicator of how they perceive your leadership. Residents do not require full happiness to advance to the next population tier; only their basic needs must be fulfilled. However, happy residents are less likely to [[City incidents#Riots|riot]], can offer you [[quests]] and can organize [[Happiness#Festivals|festivals]] that provide useful buffs to the islands' residents, [[production]], or [[attractiveness]]. |
||
| − | {| class="mw-collapsible mw-collapsed article-table" style="text-align: left;" |
||
| + | |||
| + | There is no happiness rating in the Arctic. |
||
| + | |||
| + | ''See: [[happiness]] for more information.'' |
||
| + | |||
| + | == Advancement == |
||
| + | There are a few requirements that residences have to meet to be able to advance to the next tier: |
||
| + | * residences have to be full |
||
| + | * all basic needs must be fulfilled |
||
| + | * enough construction material has to be available |
||
| + | Unlike in previous Anno games, your people don't have to be happy to advance. Your population can be unhappy or even angry and you can still advance to higher tiers as long as all requirements are met. |
||
| + | |||
| + | To advance a residence you can choose a building and press the upgrade button or you can use the upgrade tool and click on one or several residences at once. After choosing the upgrade tool, green arrows will appear over residences which can be upgraded. In the game settings to you can also choose to see these arrows all the time. |
||
| + | |||
| + | Theoretically you can upgrade all residences to higher tiers. However, you need workforce from all tiers to enable your production buildings to operate. It is advised to keep a surplus of all workforce types when upgrading residences. |
||
| + | {| class="article-table" |
||
| + | !Residence type |
||
| + | !Construction costs |
||
| + | !Upgrade costs |
||
|- |
|- |
||
| + | ! colspan="3" |Old World |
||
| − | ![[File:Investors-0.png|32px]][[File:Investors.png|48px]] |
||
| − | ! colspan="6" |Investors' Needs |
||
|- |
|- |
||
| + | |Farmers residences |
||
| − | ! style="text-align:center;" | |
||
| + | |2 [[File:Timber.png|24px]] |
||
| − | !Need |
||
| + | |4 [[File:Timber.png|24px]] |
||
| − | !Consumption |
||
| − | !Influx |
||
| − | !Happiness |
||
| − | !Income |
||
| − | !Population requirement |
||
|- |
|- |
||
| + | |Workers residences |
||
| − | | rowspan="8" |'''Basic Needs:''' |
||
| − | |[[File: |
+ | |6 [[File:Timber.png|24px]] |
| + | |6 [[File:Timber.png|24px]]<br />2 [[File:Bricks.png|24px]]<br />2 [[File:Steel beams.png|24px]] |
||
| − | | style="text-align:center;" |0,0003555552 |
||
| − | | style="text-align:center;" |16 |
||
| − | | style="text-align:center;" | - |
||
| − | | style="text-align:center;" | +?/+?/+? |
||
| − | | style="text-align:center;" | |
||
|- |
|- |
||
| + | |Artisans residences |
||
| − | |[[File:Coffee.png|24px]][[Coffee Roaster|Coffee]] |
||
| + | |12 [[File:Timber.png|24px]]<br />2 [[File:Bricks.png|24px]]<br />2 [[File:Steel beams.png|24px]] |
||
| − | | style="text-align:center;" |0,0018823524 |
||
| + | |8 [[File:Timber.png|24px]]<br />3 [[File:Bricks.png|24px]]<br />2 [[File:Steel beams.png|24px]]<br />2 [[File:Windows.png|24px]] |
||
| − | | style="text-align:center;" |8 |
||
| − | | style="text-align:center;" | - |
||
| − | | style="text-align:center;" | +?/+?/+? |
||
| − | | style="text-align:center;" | |
||
|- |
|- |
||
| + | |Engineers residences |
||
| − | |[[File:Electric_works_oil_0.png|24px]][[Electricity]] |
||
| + | |20 [[File:Timber.png|24px]]<br />5 [[File:Bricks.png|24px]]<br />4 [[File:Steel beams.png|24px]]<br />2 [[File:Windows.png|24px]] |
||
| − | | style="text-align:center;" | |
||
| + | |10 [[File:Timber.png|24px]]<br />4 [[File:Bricks.png|24px]]<br />3 [[File:Steel beams.png|24px]]<br />3 [[File:Windows.png|24px]]<br />3 [[File:Reinforced concrete.png|24px]] |
||
| − | | style="text-align:center;" |8 |
||
| − | | style="text-align:center;" | - |
||
| − | | style="text-align:center;" | |
||
| − | | style="text-align:center;" | |
||
|- |
|- |
||
| + | |Investors residences |
||
| − | |[[File:Light_bulb_0.png|24px]][[Light Bulb Factory|Light Bulbs]] |
||
| + | |30 [[File:Timber.png|24px]]<br />9 [[File:Bricks.png|24px]]<br />7 [[File:Steel beams.png|24px]]<br />5 [[File:Windows.png|24px]]<br />3 [[File:Reinforced concrete.png|24px]] |
||
| − | | style="text-align:center;" |0,000499992 |
||
| − | | style="text-align:center;" |8 |
||
| − | | style="text-align:center;" | - |
||
| − | | style="text-align:center;" | +?/+?/+? |
||
| − | | style="text-align:center;" | |
||
|- |
|- |
||
| + | |Scholars residences |
||
| − | |[[File:Champagne.png|24px]][[Champagne Cellar|Champagne]] |
||
| + | |1 [[File:Campus_Extension_Permit.png|24px]]<br />10 [[File:Timber.png|24px]]<br />15 [[File:Bricks.png|24px]]<br />12 [[File:Steel beams.png|24px]]<br />10 [[File:Windows.png|24px]] |
||
| − | | style="text-align:center;" |0,0004704 |
||
| + | | |
||
| − | | style="text-align:center;" |2 |
||
| − | | style="text-align:center;" | - |
||
| − | | style="text-align:center;" | +?/+?/+? |
||
| − | | style="text-align:center;" |1 |
||
|- |
|- |
||
| + | ! colspan="3" |New World |
||
| − | |[[File:Cigars.png|24px]][[Cigar Factory|Cigars]] |
||
| − | | style="text-align:center;" |0,000444444 |
||
| − | | style="text-align:center;" |2 |
||
| − | | style="text-align:center;" | - |
||
| − | | style="text-align:center;" | +?/+?/+? |
||
| − | | style="text-align:center;" |750 |
||
|- |
|- |
||
| + | |Jornaleros residences |
||
| − | |[[File:Chocolate.png|24px]][[Chocolate Factory|Chocolate]] |
||
| + | |1 [[File:Timber.png|24px]] |
||
| − | | style="text-align:center;" |0,0010666668 |
||
| + | |2 [[File:Timber.png|24px]] |
||
| − | | style="text-align:center;" |2 |
||
| − | | style="text-align:center;" | - |
||
| − | | style="text-align:center;" | +?/+?/+? |
||
| − | | style="text-align:center;" |1750 |
||
|- |
|- |
||
| + | |Obreros residences |
||
| − | |[[File:Steam_carriage_0.png|24px]][[Cab Assembly Line|Steam Carriages]] |
||
| + | |3 [[File:Timber.png|24px]] |
||
| − | | style="text-align:center;" |0,000133332 |
||
| + | | |
||
| − | | style="text-align:center;" |4 |
||
| − | | style="text-align:center;" | - |
||
| − | | style="text-align:center;" | +?/+?/+? |
||
| − | | style="text-align:center;" |5000 |
||
|- |
|- |
||
| − | + | ! colspan="3" |The Arctic |
|
| − | |[[File:High_wheeler_0.png|24px]][[Bicycle Factory|High Wheelers]] |
||
| − | | style="text-align:center;" |0,0009999996 |
||
| − | | style="text-align:center;" | - |
||
| − | | style="text-align:center;" |4 |
||
| − | | style="text-align:center;" | +?/+?/+? |
||
| − | | style="text-align:center;" | |
||
|- |
|- |
||
| + | |Explorers shelters |
||
| − | |[[File:Pocket_watch_0.png|24px]][[Clockmakers|Pocket Watches]] |
||
| + | |2 [[File:Timber.png|24px]] |
||
| − | | style="text-align:center;" |0,0003137256 |
||
| + | |4 [[File:Timber.png|24px]] |
||
| − | | style="text-align:center;" | - |
||
| − | | style="text-align:center;" |3 |
||
| − | | style="text-align:center;" | +?/+?/+? |
||
| − | | style="text-align:center;" | |
||
|- |
|- |
||
| + | |Technicians shelters |
||
| − | |[[File:Bank_0.png|24px]][[Bank]] |
||
| + | |6 [[File:Timber.png|24px]] |
||
| − | | style="text-align:center;" | |
||
| + | | |
||
| − | | style="text-align:center;" | - |
||
| − | | style="text-align:center;" |2 |
||
| − | | style="text-align:center;" | +?/+?/+? |
||
| − | | style="text-align:center;" | |
||
|- |
|- |
||
| + | ! colspan="3" |Enbesa |
||
| − | |[[File:Club_house_0.png|24px]][[Members Club|Club House]] |
||
| − | | style="text-align:center;" | |
||
| − | | style="text-align:center;" | - |
||
| − | | style="text-align:center;" |5 |
||
| − | | style="text-align:center;" | +?/+?/+? |
||
| − | | style="text-align:center;" |750 |
||
|- |
|- |
||
| + | |Shepherd Residence |
||
| − | |[[File:jewelry_0.png|24px]][[Jewellers|Jewelry]] |
||
| + | |1 [[File:Wanza_Timber.png|24px]] |
||
| − | | style="text-align:center;" |0,0004210524 |
||
| + | |2 [[File:Wanza_Timber.png|24px]] |
||
| − | | style="text-align:center;" | - |
||
| − | | style="text-align:center;" |2 |
||
| − | | style="text-align:center;" | +?/+?/+? |
||
| − | | style="text-align:center;" |1750 |
||
|- |
|- |
||
| + | |Elder Residence |
||
| − | |[[File:Phonographs_0.png|24px]][[Gramophone Factory|Gramophones]] |
||
| + | |3 [[File:Wanza_Timber.png|24px]] |
||
| − | | style="text-align:center;" |0,00010524 |
||
| + | | |
||
| − | | style="text-align:center;" | - |
||
| − | | style="text-align:center;" |4 |
||
| − | | style="text-align:center;" | +?/+?/+? |
||
| − | | style="text-align:center;" |3000 |
||
|} |
|} |
||
| − | + | == Profile level == |
|
| + | The global population of your empire determines the profile level of each game save. These indicate the available amount of influence and reaching higher levels are required to unlock more powerful propaganda articles. |
||
| + | ''See: [[Profile level]] for more information.'' |
||
| − | ==== Jornaleros needs ==== |
||
| + | |||
| − | {| class="mw-collapsible mw-collapsed article-table" style="text-align: left;" |
||
| + | == Island level == |
||
| + | Each island has a certain level which depends on the number of inhabitants of the highest tier living on the island. It's displayed at the top of the screen, right after the [[Attractiveness|attractiveness status]] of the island. |
||
| + | {| class="article-table" |
||
| + | !Island's Level |
||
| + | !Requirement |
||
|- |
|- |
||
| + | ! colspan="2" |Old World |
||
| − | ![[File:Workforce_-_jornaleros.png|32px]][[File:Jornaleros.png|48px]] |
||
| − | ! colspan="6" |Jornaleros' Needs |
||
|- |
|- |
||
| + | |Settlement |
||
| − | ! style="text-align:center;" | |
||
| + | |none |
||
| − | !Need |
||
| − | !Consumption |
||
| − | !Influx |
||
| − | !Happiness |
||
| − | !Income |
||
| − | !Population requirement |
||
|- |
|- |
||
| + | |Village |
||
| − | | rowspan="3" |'''Basic Needs:''' |
||
| + | |100 {{Infoicon Farmers}} |
||
| − | |[[File:Marketplace.png|24px]][[Marketplace_(New_World)|Market]] |
||
| − | | style="text-align:center;" | |
||
| − | | style="text-align:center;" |5 |
||
| − | | style="text-align:center;" | - |
||
| − | | style="text-align:center;" | |
||
| − | | style="text-align:center;" | |
||
|- |
|- |
||
| + | |Port Town |
||
| − | |[[File:Fried_plantains.png|24px]][[Fried Plantain Kitchen|Fried Plantains]] |
||
| + | |150 {{Infoicon Workers}} |
||
| − | | style="text-align:center;" |0,00285714 |
||
| − | | style="text-align:center;" |3 |
||
| − | | style="text-align:center;" | - |
||
| − | | style="text-align:center;" | +3/+3/+? |
||
| − | | style="text-align:center;" |50 |
||
|- |
|- |
||
| + | |City |
||
| − | |[[File:Poncho.png|24px]][[Poncho Darner|Ponchos]] |
||
| + | |500 {{Infoicon Artisans}} |
||
| − | | style="text-align:center;" |0,002500002 |
||
| − | | style="text-align:center;" |2 |
||
| − | | style="text-align:center;" | - |
||
| − | | style="text-align:center;" | +3/+3/+? |
||
| − | | style="text-align:center;" |200 |
||
|- |
|- |
||
| + | |Capital |
||
| − | | rowspan="2" |'''Luxury Needs:''' |
||
| + | |500 {{Infoicon Engineers}} |
||
| − | |[[File:Rum.png|24px]][[Rum Distillery|Rum]] |
||
| − | | style="text-align:center;" |0,00142857 |
||
| − | | style="text-align:center;" | - |
||
| − | | style="text-align:center;" |6 |
||
| − | | style="text-align:center;" | +3/+3/+? |
||
| − | | style="text-align:center;" |100 |
||
|- |
|- |
||
| + | |Metropolis |
||
| − | |[[File:Church.png|24px]][[Chapel]] |
||
| + | |1750 {{Infoicon Investors}} |
||
| − | | style="text-align:center;" | |
||
| − | | style="text-align:center;" | - |
||
| − | | style="text-align:center;" |14 |
||
| − | | style="text-align:center;" | |
||
| − | | style="text-align:center;" |300 |
||
| − | |} |
||
| − | |||
| − | ==== Obreros needs ==== |
||
| − | {| class="mw-collapsible mw-collapsed article-table" style="text-align: left;" |
||
|- |
|- |
||
| + | ! colspan="2" |New World |
||
| − | ![[File:Workforce_-_obreros.png|32px]][[File:Obreros.png|48px]] |
||
| − | ! colspan="6" |Obreros' Needs |
||
|- |
|- |
||
| + | |Settlement |
||
| − | ! style="text-align:center;" | |
||
| + | |none |
||
| − | !Need |
||
| − | !Consumption |
||
| − | !Influx |
||
| − | !Happiness |
||
| − | !Income |
||
| − | !Population requirement |
||
|- |
|- |
||
| + | |Town |
||
| − | | rowspan="7" |'''Basic Needs:''' |
||
| + | |200 {{Infoicon Jornaleros}} |
||
| − | |[[File:Marketplace.png|24px]][[Marketplace_(New_World)|Market]] |
||
| − | | style="text-align:center;" | |
||
| − | | style="text-align:center;" |5 |
||
| − | | style="text-align:center;" | - |
||
| − | | style="text-align:center;" | |
||
| − | | style="text-align:center;" | |
||
|- |
|- |
||
| + | |Colony |
||
| − | |[[File:Fried_plantains.png|24px]][[Fried Plantain Kitchen|Fried Plantains]] |
||
| + | |600 {{Infoicon Obreros}} |
||
| − | | style="text-align:center;" |0,002857143 |
||
| − | | style="text-align:center;" |3 |
||
| − | | style="text-align:center;" | - |
||
| − | | style="text-align:center;" | +6/+6/+? |
||
| − | | style="text-align:center;" | |
||
|- |
|- |
||
| + | ! colspan="2" |The Arctic |
||
| − | |[[File:Poncho.png|24px]][[Poncho Darner|Ponchos]] |
||
| − | | style="text-align:center;" |0,002499999 |
||
| − | | style="text-align:center;" |2 |
||
| − | | style="text-align:center;" | - |
||
| − | | style="text-align:center;" | +6/+6/+? |
||
| − | | style="text-align:center;" | |
||
|- |
|- |
||
| + | |Settlement |
||
| − | |[[File:Tortilla.png|24px]]Burritos |
||
| + | |none |
||
| − | | style="text-align:center;" |0,00142857 |
||
| − | | style="text-align:center;" |4 |
||
| − | | style="text-align:center;" | - |
||
| − | | style="text-align:center;" | +3/+2/+? |
||
| − | | style="text-align:center;" |1 |
||
|- |
|- |
||
| + | |Camp |
||
| − | |[[File:Coffee.png|24px]][[Coffee Roaster|Coffee]] |
||
| + | |250 {{Infoicon Explorers}} |
||
| − | | style="text-align:center;" |0,000588237 |
||
| − | | style="text-align:center;" |2 |
||
| − | | style="text-align:center;" | - |
||
| − | | style="text-align:center;" | +3/+2/+? |
||
| − | | style="text-align:center;" |300 |
||
|- |
|- |
||
| + | |Outpost |
||
| − | |[[File:Bowler_hats.png|24px]][[Bombín_Weaver|Bowler Hats]] |
||
| + | |1000 {{Infoicon Technicians}} |
||
| − | | style="text-align:center;" |0,001333332 |
||
| − | | style="text-align:center;" |2 |
||
| − | | style="text-align:center;" | - |
||
| − | | style="text-align:center;" | +3/+2/+? |
||
| − | | style="text-align:center;" |600 |
||
|- |
|- |
||
| + | ! colspan="2" |Enbesa |
||
| − | |[[File:Sewing_machines.png|24px]][[Sewing Machine Factory|Sewing Machines]] |
||
| − | | style="text-align:center;" |0,001250001 |
||
| − | | style="text-align:center;" |2 |
||
| − | | style="text-align:center;" | - |
||
| − | | style="text-align:center;" | +6/+?/+? |
||
| − | | style="text-align:center;" |1000 |
||
|- |
|- |
||
| + | |Settlement |
||
| − | | rowspan="5" |'''Luxury Needs:''' |
||
| + | |none |
||
| − | |[[File:Rum.png|24px]][[Rum Distillery|Rum]] |
||
| − | | style="text-align:center;" |0,001428573 |
||
| − | | style="text-align:center;" | - |
||
| − | | style="text-align:center;" |3 |
||
| − | | style="text-align:center;" | +6/+6/+? |
||
| − | | style="text-align:center;" | |
||
|- |
|- |
||
| + | |District |
||
| − | |[[File:Church.png|24px]][[Chapel]] |
||
| + | |150 {{Infoicon Shepherds}} |
||
| − | | style="text-align:center;" | |
||
| − | | style="text-align:center;" | - |
||
| − | | style="text-align:center;" |7 |
||
| − | | style="text-align:center;" | |
||
| − | | style="text-align:center;" | |
||
|- |
|- |
||
| + | |Major District |
||
| − | |[[File:Boxing_Arena.png|24px]][[Boxing Arena]] |
||
| + | |600 {{Infoicon Elders}} |
||
| − | | style="text-align:center;" | |
||
| − | | style="text-align:center;" | - |
||
| − | | style="text-align:center;" |4 |
||
| − | | style="text-align:center;" | +3/+2/+? |
||
| − | | style="text-align:center;" |300 |
||
| − | |- |
||
| − | |[[File:Beer-0.png|24px]]Beer |
||
| − | | style="text-align:center;" |0,001333332 |
||
| − | | style="text-align:center;" | - |
||
| − | | style="text-align:center;" |4 |
||
| − | | style="text-align:center;" | +7/+7/+? |
||
| − | | style="text-align:center;" |600 |
||
| − | |- |
||
| − | |[[File:Cigars.png|24px]][[Cigar Factory|Cigars]] |
||
| − | | style="text-align:center;" |0,000555555 |
||
| − | | style="text-align:center;" | - |
||
| − | | style="text-align:center;" |2 |
||
| − | | style="text-align:center;" | +9/+?/+? |
||
| − | | style="text-align:center;" |1000 |
||
|} |
|} |
||
| + | '''Trivia''' |
||
| − | == Happiness == |
||
| − | Residents do not require full happiness to advance to the next population tier, only their basic needs must be fulfilled. Happy residents pay higher taxes, are less likely to riot and can organise festivals that provide useful buffs to the islands' residents, production, or attractiveness. |
||
| + | The in game representation of Investor resembles Van der Luyden male character from the 1993 movie "The Age of Innocence" |
||
| − | The happiness levels are influenced by five factors: |
||
| + | [[Category:Gameplay]] |
||
| − | * Luxury - people want to be supplied with luxury goods like schnapps for farmers and have access to certain public buildings like church for workers. |
||
| + | [[Category:Population]] |
||
| − | * Island peace - people are happy when the island is safe and there is no war. When island is under attack happiness gets lower and lower the longer a war goes on. |
||
| − | * Working conditions - it's possible to exploit your workers and make them work harder which negatively impacts their happiness. You can also shorten their working time to make them happy. |
||
| − | * Pollution - heavy industry factories generate pollution which lowers both population's happiness and city attractiveness. Having only a few heavy industry factories or none will increase inhabitants's happiness. |
||
| − | * News - newspaper articles can influence the happiness of your people. Negative articles about fires or wars lower population's happiness. Positive articles about better diplomatic relations or positive credit balance increase the happiness. It's possible to use influence to change the impact of articles but using too much propaganda can result in lower happiness and riots. |
||
Revision as of 22:50, 21 January 2021
A player's population lies at the heart of all Anno titles, and provides the player with the workforce and tax income necessary to sustain their cities and creations. At the start of a game, the player's population is little more than a gathering of humble farmers living in huts, but like in all Anno titles that came before it, is able to guide them across a social ladder by supplying them with their needs. This allows the population to evolve into new, more advanced social classes, which will be reflected by the quality of their dwellings. These different social classes are referred to as population tiers. By reaching milestones in population sizes and tiers, more features and buildings are unlocked.
The global number of inhabitants living inside a player's empire, is shown at the top of the screen, next to the population symbol ![]() . Hovering over this symbol with the mouse, breaks this information down into seperate tiers.
. Hovering over this symbol with the mouse, breaks this information down into seperate tiers.
When hovering over an island, its population status appears at the top of the screen (see picture below).

When hovering over an island, the center-top bar will show a portrait of the highest population class. The lower strip breaks down the number of people belongs to each population class, represented by their associated icon.
Population Tiers
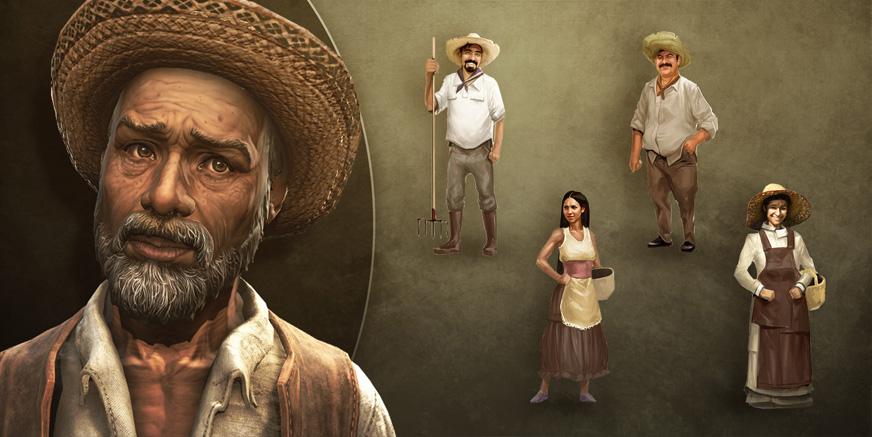
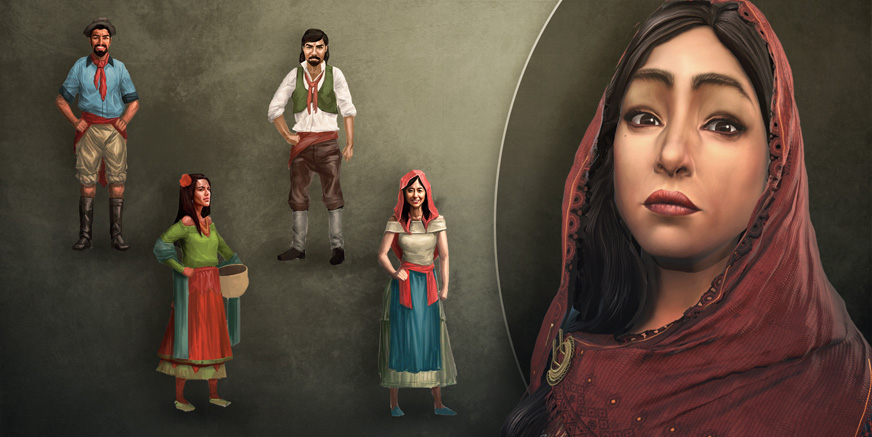
In Anno 1800, there are six population tiers in the Old World, two in the New World, two in The Arctic and two in Enbesa. Each resides in a 3x3 house (except Scholar Residences which size is 4x4) and has different needs.
 The Old World


 The New World


The Arctic


Enbesa


Needs
Your population has certain needs and satisfying them is one of the main objectives in Anno. Population needs in Old World and New World are divided into two categories: basic needs and luxury needs. Population needs in The Arctic work differently and are instead, divided into basic needs and heat.
Fulfilling basic needs increases the number of inhabitants in each house. Houses have to be full in order to advance them to higher population tiers so satisfying all basic needs is necessary.
Fulfilling luxury needs makes your population happy and pay higher taxes in return. Satisfying luxury needs is optional as people don't need to be happy to advance.
Fulfilling heat - the need to stay warm - will also make the Arctic population pay higher taxes, but instead of raising happiness, this will help prevent outbreaks of the Arctic Flu.
Failure to fulfill a requested basic need or luxury need will result in the Newspaper Editor publishing an article that increased the consumption rate of goods by 10% in Old World and New World. This can be countered using propaganda.
See: needs for more information.
Happiness
The happiness of your population is an important indicator of how they perceive your leadership. Residents do not require full happiness to advance to the next population tier; only their basic needs must be fulfilled. However, happy residents are less likely to riot, can offer you quests and can organize festivals that provide useful buffs to the islands' residents, production, or attractiveness.
There is no happiness rating in the Arctic.
See: happiness for more information.
Advancement
There are a few requirements that residences have to meet to be able to advance to the next tier:
- residences have to be full
- all basic needs must be fulfilled
- enough construction material has to be available
Unlike in previous Anno games, your people don't have to be happy to advance. Your population can be unhappy or even angry and you can still advance to higher tiers as long as all requirements are met.
To advance a residence you can choose a building and press the upgrade button or you can use the upgrade tool and click on one or several residences at once. After choosing the upgrade tool, green arrows will appear over residences which can be upgraded. In the game settings to you can also choose to see these arrows all the time.
Theoretically you can upgrade all residences to higher tiers. However, you need workforce from all tiers to enable your production buildings to operate. It is advised to keep a surplus of all workforce types when upgrading residences.
| Residence type | Construction costs | Upgrade costs |
|---|---|---|
| Old World | ||
| Farmers residences | 2 |
4 |
| Workers residences | 6 |
6 2 2 |
| Artisans residences | 12 2 2 |
8 3 2 2 |
| Engineers residences | 20 5 4 2 |
10 4 3 3 3 |
| Investors residences | 30 9 7 5 3 | |
| Scholars residences | 1 10 15 12 10 |
|
| New World | ||
| Jornaleros residences | 1 |
2 |
| Obreros residences | 3 |
|
| The Arctic | ||
| Explorers shelters | 2 |
4 |
| Technicians shelters | 6 |
|
| Enbesa | ||
| Shepherd Residence | 1 |
2 |
| Elder Residence | 3 |
|
Profile level
The global population of your empire determines the profile level of each game save. These indicate the available amount of influence and reaching higher levels are required to unlock more powerful propaganda articles.
See: Profile level for more information.
Island level
Each island has a certain level which depends on the number of inhabitants of the highest tier living on the island. It's displayed at the top of the screen, right after the attractiveness status of the island.
| Island's Level | Requirement |
|---|---|
| Old World | |
| Settlement | none |
| Village | 100 |
| Port Town | 150 |
| City | 500 |
| Capital | 500 |
| Metropolis | 1750 |
| New World | |
| Settlement | none |
| Town | 200 |
| Colony | 600 |
| The Arctic | |
| Settlement | none |
| Camp | 250 |
| Outpost | 1000 |
| Enbesa | |
| Settlement | none |
| District | 150 |
| Major District | 600 |
Trivia
The in game representation of Investor resembles Van der Luyden male character from the 1993 movie "The Age of Innocence"